Showing posts with label diy. Show all posts

Thursday, July 10, 2014

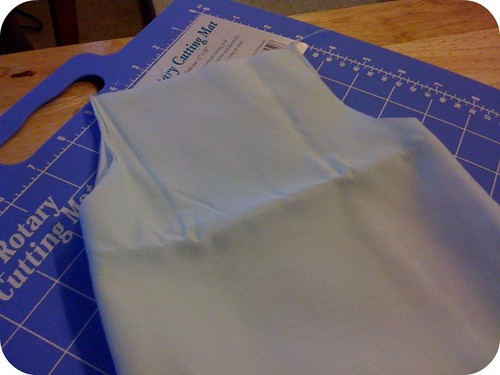
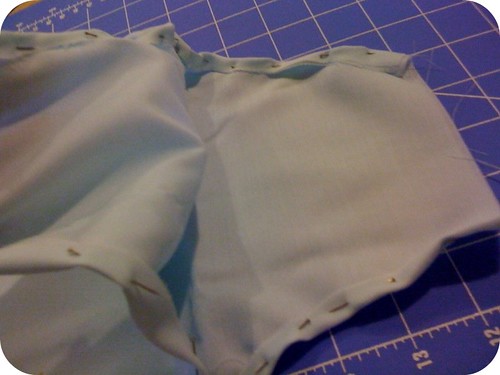
I Made a Pillowcase Dress!

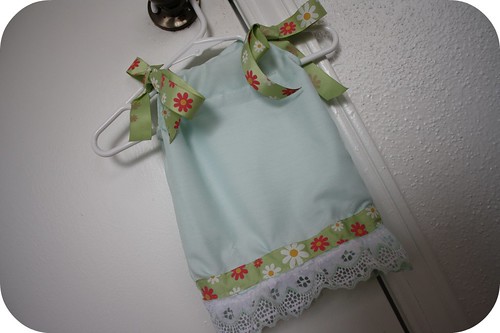
I'm standing by my stance that I'm not crafty... But I'm taking a stab at new crafts as a part of my apparent nesting craze.

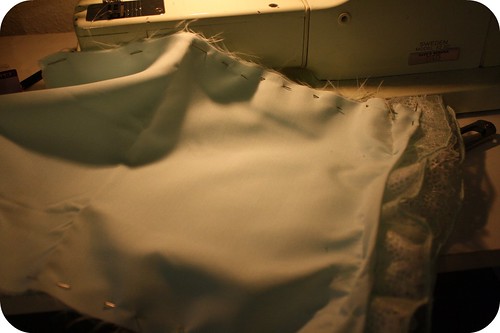
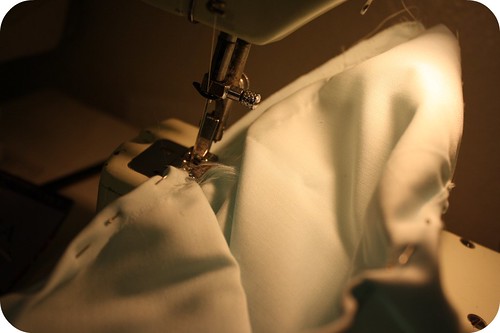
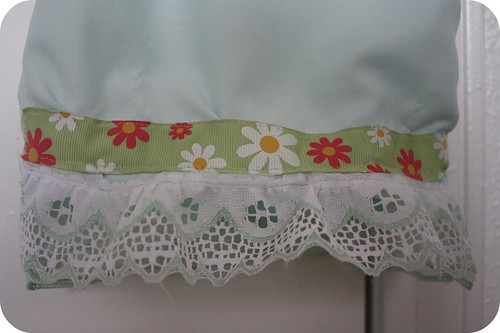
I'm not going to post a DIY for this one right now, I'm sure you could google and find lots of tutorials. I like this tutorial on Baby Rabies, but it's a little different than the one I made since I added more frill and ribbon. I found her tutorial after I made mine and quite honestly I kinda just "wong it" with this one and didn't follow measurements or a pattern besides holding it up to a couple of other dresses I've bought for her.


Not bad for my first one but I'm going to make another attempt soon!I was hoping it would come out about 3 month-size but it's really small, more like newborn size. So hopefully she'll be more around 7lbs when she's born and not like her more than 10lb daddy! We'll see!

Promise the next one I make (if it's cuter) I'll post all my own DIY instructions so you can make your own pillowcase dress!

What do you think? Like it?

Monday, June 9, 2014

DIY Hairbow Clips: What I'm Making Monday

Ever seen those adorable hair bow clippies? I found a cute shop on Etsy where their bows are all just $1. But before I went crazy I thought I'd try making some of my own and whatdoyaknow... It's way easy!
What you'll need:
Some ribbon that's about 3/8in wide
Metal 2 prong clips
Hot glue
Scissors
Lighter (to defray/seal the ends of the ribbon)

Step 1: Glue ribbon around and inside the prong clip

Step 2: Cut a piece of ribbon about 2in long and glue the two ends together so it makes a circle.

Step 3: Glue the middle of that circle together by placing a dab of glue on one end then squeezing it together.

Step 4: Glue the pinched circle to the metal prong covered in ribbon.
Step 5: Cut a 1 inch piece of ribbon, wrap it around the pinched part of the bow and glue it to the top inside part of the clippie.
TADA!! Her first Pony tail!
hair clip
What do you think? I went crazy and made all sorts of Halloween ones that I forgot I made until Halloween night but oh well, there's always next year.
Two people who comment on this post before next Monday (November 8th) will win a clippie of their choice. You can choose one of these, or I have lots of other colors of ribbon if you have another color in mind.

If you follow my blog or link up to What I'm Making Monday below, let me know in another comment as an extra entry!

Winner from last week's WIMM: #22 April! Email me back and I'll send you the tutu dress!

What I'm Making Monday


(highlight ctl+c)

Tuesday, June 3, 2014

How to Make DIY Wall Letters: What I'm Makin' Monday

I've been meaning to post about this for a long time, but I never got around to it because I forgot to import my photos.

Before my daughter was born I decorated wooden wall letters to hang in her nursery, over her diaper changer. I looked at buying some but thought a personal touch would not only save me some money, but be a fun way to get exactly what I was looking for. It didn't take much time, and I had nothing but it when I was waiting for her to arrive!
(This isn't mine but it's an example of a finished product)
I'm not much of a painter myself so I used scrapbook paper to get a clean look with a pretty finish that makes it look like it was painted on!
{All you need} 
Is a little modge podge, paint, the letters, an X-ACTO knife, a little sand paper, and some scrapbook paper, and you're good to go!

I ordered my daughter's letters off Ebay. I got 10" letters for a couple dollars each from a place like this.

{Step 1} 
I painted the backs and sides of the letters.
{Step 2} 
Spread Modge Podge all over the letter then placed the scrapbook paper over top, and put more modge podge on top.
{Step 3} 
Then I used my X-ACTO-knife to trace/cut around the edges of the letters with the scrapbook paper I picked out.
{Step 4}
Sand around the edges to smooth out the paper next to the wood.

{Step 5-Optional} 
To make it pretty and hang it up I tacked some satin ribbon to the back of the letters and hung them up in her nursery!
 Trust me, it looks marvelous!

Another example: Source.
What did you make?

What I'm Making Monday


(highlight ctl+c)

Sunday, June 1, 2014

Little Ms. Claus Dress: What I'm Makin' Monday

Monday is almost over, but I figured it's better I post it today than next Monday when it's WAY after Christmas! I'm so proud of my creation!
I can't take all of the crecit cause I got an idea to make a dress like this after seeing a similar one by my friend Jess's sister who own's the shop Our Little Tutus. So if you think you can't make one of these, you can buy one for under $30!

I saw a picture of her Santa tutu dress and decided to create one with the flair of a pettiskirt. So I made a tutu pettiskirt style dress using tulle, ribbon, a red crocheted baby beanie and headband and feathers/more tulle.

I made it by hand sewing together a red baby beanie I opened up to a wide baby headband.

Then I made the tutu dress like I explained in this tutorial. Then I tied small white strips to the ends of the red tulle skirt to make it look like a mock pettiskirt.
I added more frill by hand stitching a feather boa-like embellishment to the top front of the dress bodice. Note: DON'T stitch it all around. I did that at first and forgot that she'd have to fit in it. The bodice gives but the feather's didn't so I had to undo half of my stitching around the back.

After a photoshoot with the feather's I realized baby drool and feathers don't mix so I went back and tied white tulle to the top of the bodice (the same way I did with the red around the bottom) and trimmed it all down to the same length.

I added a black satin ribbon as the Ms. Claus belt with a rhinestone buckle (I found at Hobby Lobby).
TADA!

Saturday, May 10, 2014

DIY Anne Geddes-Style Flower Hat Photo Prop: What I'm Makin' Monday

I've been pondering how I could unleash my inner Anne Geddes and spruce up my 365 Photos (I didn't give up, I just haven't uploaded last week's yet. Maybe tomorrow.) a little from time to time. I've been admiring her photos of little babies dressed up as animals, fruits, veggies, and flowers since I got her recent book.


Lace Ruffle Pettiromper from BNB Boutique; Flower Hat, Homemade!
One of her signatures is little babies with little flower heads in flower pots. See what I mean? But where do you find those flower hats? I found some on etsy and from photo prop stores, but the cheapest one I could find was still $35 plus shipping.

Hmm, I bet I could make one of these on my own. I thought.

I wasn't sure when I'd tackle this project, it's just another one of those craft things I put in the back of my mind and complete who knows when.

But lo and behold, when I went shopping for an American Flag at the dollar store I saw pretty flowers and decided I'd make one with supplies from the Dollar Tree.

Here's how I did it with NO instructions. Just winged it and hoped for the best.

Supplies:
Flowers (I bought 6 Dollar Tree Bouquets) $6
Baby beanie $1
Hot glue gun (already own)

Step 1:
Pull the flowers off the stems. This isn't hard as they aren't glued, just tug a little and POP! They're off!

Step 2: 
Cut the beanie down to the size you want. Note: If you cut the elastic/scrunchy part off it may not stay as well. This hat was too big, so I cut a bit off the bottom.

Step 3: 
Starting at the center top, glue a flower to the hat. Glue more flowers around that one.

Step 4:
Repeat until the hat is covered.

Step 5: 
Make sure all of the hat is covered, and the glue has dried. Find a cute baby to model it in a flower pot and TADA!!
An Anne Geddes style hat for $7!
You're welcome! Have you made anything over the past few weeks? Link up! It can be a recipe, a picture, a craft, anything! I'll be sure to stop by and feature one in next week's (or whenever the next Makin' Monday post is) Makin' Monday!

What I'm Making Monday


(highlight ctl+c)

Sunday, April 27, 2014

DIY Play Dough: What I'm Makin' Monday

I'm once again reviving my Domestic Diva section of my blog. I'm determined to try new things, make new things, and show it off so you can all tell me how awesome I am.
Ok, so making home made play dough isn't exactly putting me in the ranks for the Martha Stewart network. But I've never done it before, and thought others may find this tutorial helpful. First, prop your kiddo in the kitchen so they can see how it's done. But give them some food or something fun to play with so they're entertained from below and not too close to the heat on the stove.

Here's what you'll need. (I forgot to add the Mr. Oil to the photo shoot so I drew him in).
2 1/2 cups flour
1/2 cup salt
2 (4gram) packages of kool aid
2 cups boiling water
3 tablespoons oil

1) Boil 2 cups water on stove.

2) While that's starting to boil, in a large bowl mix flour, salt and kool-aid until it's blended. (spoon works)

3) Add oil to boiling water and; remove pan from heat.
4) Add everything from the bowl of dry ingredients to the pan of water and mix until cool enough to knead.

5) Knead (roll, pinch, fold in half repeatedly) until it's blended well. Add extra flour as you need until it isn't sticky. I usually use at least a half cup flour on the counter to start.

VOILA playdough! (You may have to let it cool for a half hour or so to be safe).

PLAY!

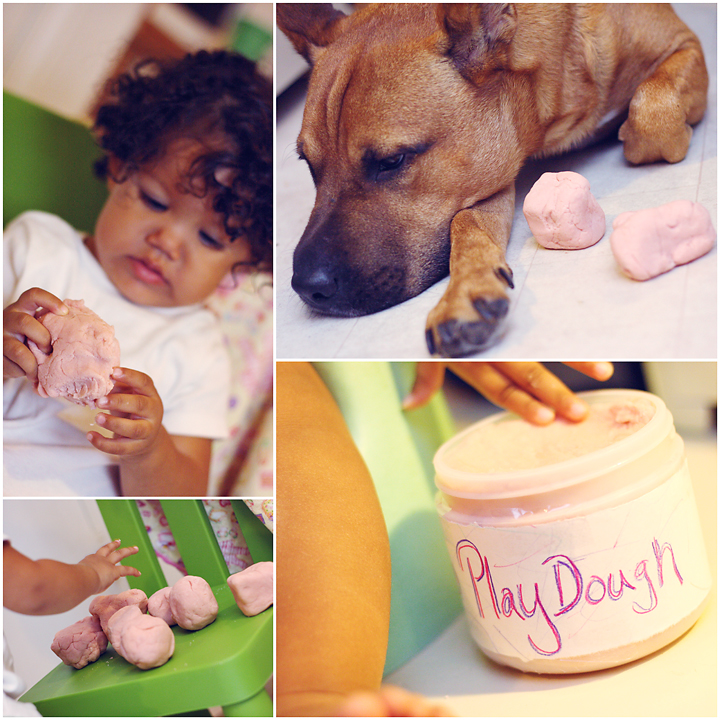
I washed out one of my old face wash pad containers and stored it in there. Lil' J helped me decorate the label.

*Store in refrigerator (as there are no preservatives or chemicals) stores for several months.

A big thanks to Cambria Laine for the idea.

What do you think? Lil' J wasn't sure what to think at first, but once I started making it into shapes she got into it. Snoop wanted to eat it at first but is a good boy when you tell him to "leave it." He did sneak one of the play dough balls away while I wasn't looking and took it to the livingroom, but luckily it didn't get smushed into the carpet.

And there you have it! A new toy!

A friend of mine is giving me a sewing lesson today. I bought a pattern to make a dress for Lil' J and she said she's translate it for me. If all goes well, I'll show it off next week. Of course it won't be a tutorial, but just a show off session.

Made anything lately? Craft, recipe, tutorial, etc? Show it off an link up below! Grab my button if you like or just link back here to keep the hippidy hop going.
What I'm Making Monday


(highlight ctl+c)


Also linking to:
Sumos Sweet Stuff

Mini Mod #7: Mommy-Made Dress (yes made by me, feel free to complement!)

I've been wanting to make my daughter a dress since before she was born. I have a sewing machine thanks to my fabulous in-laws, some knowledge of sewing thanks to my dog, who encouraged me to learn, and an idea of what looks cute thanks to my fabulous daughter. My husband encourages me because it means less money spent on boutique clothing, and less time to spend it because I'm fumbling around on my dang machine.

Before I continue, let me welcome you to Mini Mod! My weekly link up where we showcase our kiddos and their fashion sense. Link up below to a blog post featuring your kiddo and what they're wearing.
Dress: Made by yours truly, pattern from Designs by Elliette; Shoes from Cambria Laine
Ok, continuing on...

This is the first dress I made my daughter. I'm not counting this one because it sucked, and at a birth weight of 9lbs 9oz she couldn't even squeeze her big self into it. Don't even look at it. It wasn't cute. In fact, I'm sorta embarrassed that I just took to time to look that up and link it. YIKES!

DO OVER! That's what this was.
My motivation? Wanting a cute Halloween dress that didn't cost an arm and a leg. With how many things she has (and my desire for her to wear something different every day at school) I knew she'd only wear this thing once or twice at best. She'd be too big next year and what if our next baby is born a different time of year or is a boy? Homemade seasonal dress= problem solved!

I'm also sick of people asking me if I made her outfits and having to say "no." Can't I for once say yes?!

I added "take sewing lessons" to my "to do before #2" list and my dear friend Jennie answered my call. I'm not sure if this is because she has six kids and wants me to hurry and catch up, or just because she's nice and wants to teach a man to fish--or in my case, a mother to sew.

We had a few tweets that went something like this:

Jennie: "Come to my house and I'll teach you to sew!"
Me: "Really? You can help me? Can you make anything? And by anything I mean baby dresses."
Jennie:"Of course I can make anything, I rock"... Or something like that, I can't remember. All I know is that she said she could help me and I needed to choose a pattern.

A pattern? Oh no... Those are the death of me!

When I think of patterns I think of searching fabric stores with my grandmother, looking at pictures of outfits I liked then watching her pin fabric to tissue paper over and over again. Things that seem way to complicated for someone like me!

I emailed her about 20 patterns, a variety, knot dresses, and variations of pillowcase dresses. My favorite, a back-tie dress was the link on the top. My friend wrote back saying we could do my favorite.

Really? That's not too hard?!

The designer on Etsy said a beginner could do it but I'm lower than a beginner, I'm like a hopeless soul aspiring for the impossible.

I bought it anyway.

I downloaded the pattern and read all 23 pages of Latin pattern speak. I didn't understand half of it.

Discouraged, I messaged my friend, and asked if she understood it. Sure she wouldn't, I prepared myself for disappointment. But to my surprise she wrote back and said it was easy enough, and I could do it.

Lil' J and I went to the fabric store and picked out fabric for two dresses. I intentionally picked a fall and Halloween style because it would put me on a deadline to finish NOW.
I wrote to the pattern creator and asked about how long she thought it would take and she estimated two hours. I'm not sure if she meant for me or her but my friend doubled that estimate for us.

Monday morning I packed up my sewing stuff, dropped Lil' J off at school and headed up to Jennie's. I needed to focus and no way Lil' J would let me do that for four hours. She'd have more fun at school and I'd pick her up just after her nap.

Jennie was a fantastic teacher and I left learning a few very important things about sewing:

1. Cutting takes way longer than you'd expect. Measure twice, cut once.
2. Good scissors are some of the most important things in sewing.
3. I've got to get me one of those cool pin cushion bracelets.
4. And a bigger cutting board.
5. Ironing, though a pain, is pretty important.
6. You don't need a rufflier, you can make your own ruffles by sewing two straight lines and pulling the fabric across. 

She translated sewing words for me like "baste" "on the fold" "selvage" and helped me find short cuts, and understand the pattern. But she let me do all the work myself.

Sure, there are some mistakes. But you wouldn't notice unless you were looking. No, the quality isn't as great as what I get from boutiques, but it's cute and I made it. Yep. I made it. And seriously, if I can make this so can you.  Don't you dare say you can't. Just try it!
The pattern, and fabric for two dresses was about $22. I had enough left over fabric to make her a matching sash, and bow. I also added some decorative buttons for fun.

The best part is now? When someone asks me if I made my daughter's dress, finally, I can smile big and proud and say "Yes!"

... And then hopefully they won't then say: "I can tell."

What do you think? Be honest!... Only if you like it.

Link up to Mini Mod below so I can check out your cuties! Mini Mod of the week is Jayden and Sheena from Sophistishe repping some adorable clothes for little boys. Check out her blog to see what he's wearing, then link up your Friday Fashionista/o below.
via Sophistishe
Link up below and visit the others. Grab my button if you want too, or just link back so others can play along.


Mommy's Idea
(Highlight and Ctl+C to copy)


Also linking up to:
Small Style